Create an image asset
Upload image to website
Images should be clear and good quality.
Only gif, jpg, jpeg and png images can be used.
- Select the ‘New’ button
- Select ‘Files’ > ‘Image’
- In the ‘Create Image Wizard’:
- ‘Upload File’: Select the ‘Browse…’ button and navigate to where your image is saved on your computer (eg. L: drive or desktop) and select ‘Open’.
- ‘Title’: name it something that will make it easy for you to find again later
- ‘Alt Text’: This needs to provide a visually impaired person the same experience as if they could see the image. However, if the image does not add information to the page for the user, select ‘Yes’ under ‘Decorative only?’ which means no ‘Alt text’ is then required.
- ‘Caption’: optional. Will not appear in normal image views. Mainly for galleries.
- ‘Show in menu?’: change to ‘No’.
- ‘Create locations’: Select the ‘Select New Location’ button. This is the page that your new page will appear under. Navigate in the ‘Asset Finder’ to the parent and click the ‘Select’ button.
(Alternatively, if you have already navigated to the required location, you can click the ‘Select Current Asset’ button and click the ‘Create’ button)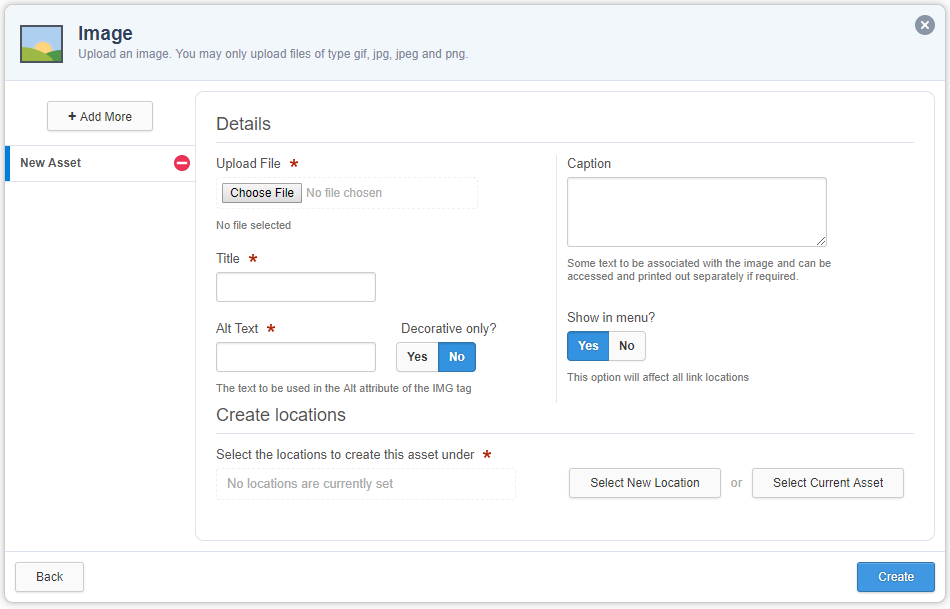
- Select ‘Save’
- Go to the ‘Details’ screen and in the change status drop-down menu select:
- If you are an approver: ‘Approve’ then ‘Make Live’.
- If you are a publisher: ‘Apply for Approval’ to put into workflow.